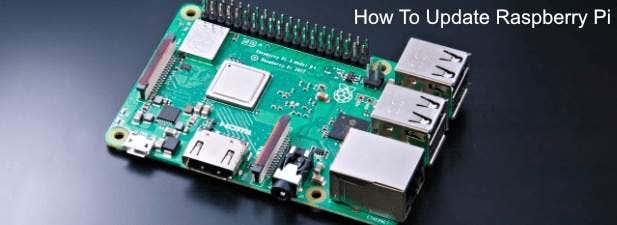
Most Raspberry Pi devices use Raspbian, the Debian-based Linux operating system specially designed for this tiny PC. If you’ve used Linux before, and you’re comfortable using the terminal, updating your Raspberry Pi won’t be too difficult. If you’re unsure, here’s how to update a Raspberry Pi to the latest version.
How to Update Raspberry Pi Software
The Raspberry Pi is a tiny, feature-filled computer. It may not look like much, but it’s more than capable of running the best Linux apps, whether you’re using Raspbian, Ubuntu, or another Linux operating system with it. That means that, like any other Linux PC, you’ll want to keep the software packages your Raspberry Pi use up-to-date using Raspbian’s built-in package manager—apt.
To update the packages on your Raspberry Pi, open a terminal window or connect to your Pi remotely using an SSH client. You’ll first need to update the list of packages from the software repository package lists. To do this type sudo apt update, then hit enter to run it.
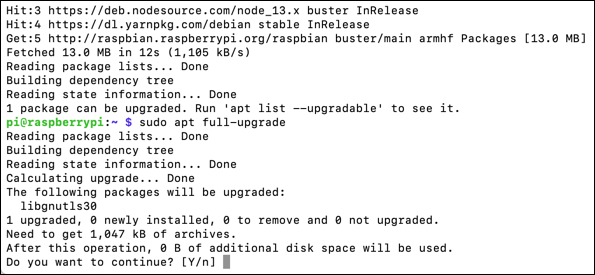
Once your package lists are updated, type sudo apt full-upgrade and hit enter to update all installed software packages to the latest available versions.
Once the packages have finished updating, it’s a good idea to tidy up and clear any now-redundant package files by typing sudo apt clean and hitting enter.
While it isn’t necessary in most instances, feel free to restart your Raspberry Pi by typing sudo reboot once any package updates have finished installing to ensure the process finishes correctly.
How to Update Raspberry Pi Firmware
The Raspberry Pi Foundation is responsible for the development of the Raspberry Pi, as well as the firmware it runs. From time to time, new firmware is released to add important security fixes or updates to your Raspberry Pi. To update your Raspberry Pi firmware, run the command sudo apt update or sudo apt full-update, which will update your Raspberry PI with stable firmware releases. If that isn’t good enough and you need to update to the latest available firmware (for critical bug fixes, for instance) you’ll need to use the rpi-update tool instead. The Raspberry PI should come installed with Raspbian, but it’s also compatible with other Linux operating systems. You can download and install it from the rpi-update GitHub page.
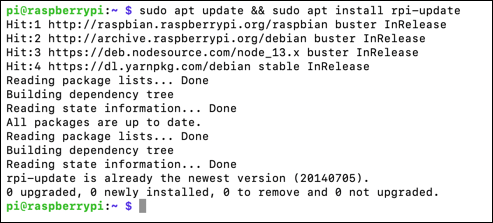
To update your Raspberry Pi firmware, you’ll need to make sure you have the latest version of the rpi-update tool installed. Open a terminal or SSH connection to your Raspberry Pi, then type sudo apt update && sudo apt install rpi-update before hitting enter.
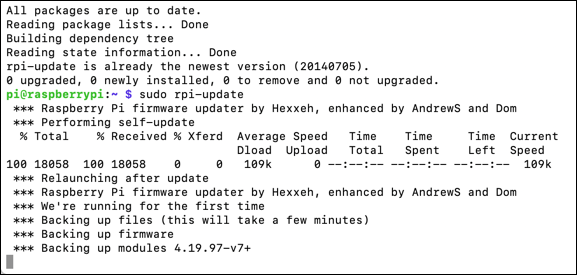
If the latest version is installed, type sudo rpi-update to run the firmware updating tool, then hit enter. You’ll need to confirm whether or not you wish to proceed with the firmware upgrade by pressing the Y key on your keyboard.
You’ll need to reboot once your Raspberry Pi firmware has updated—type sudo reboot to do this if the rpi-update tool doesn’t do it automatically.
How to Install a Major Raspbian Update on a Raspberry Pi
While the apt update process will update your software packages, it won’t update your system. While Raspbian can be updated to a major new release manually, there’s no automatic tool to do this. Performing a manual update from one Raspbian version to the next is extremely problematic, especially given the changes to packages and features from one release to the next. To perform a major update from an older Raspbian release, you should first back up your Raspberry Pi and flash the latest version of Raspbian to your Raspberry Pi’s microSD card (or SD card for older Pi models). This is also the method that the Raspberry Pi Foundation recommends over an in-place upgrade because it’s the cleanest, quickest, and best way to move from one major Raspbian release to the next. Doing this will wipe your microSD card, so make sure any files you wish to keep are backed up to an external drive before you begin.
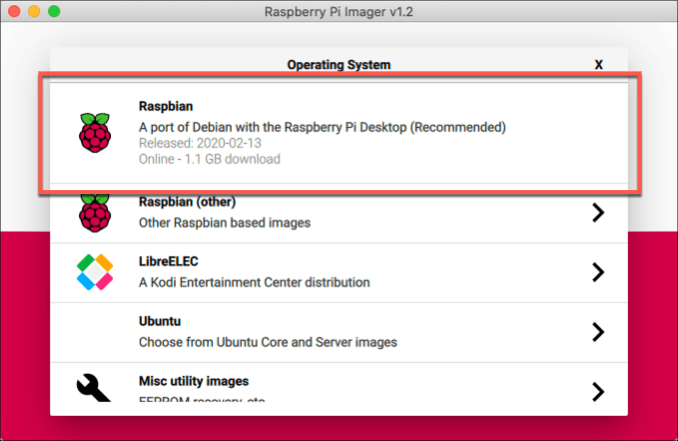
To do this, you’ll need to download and install the Raspberry Pi Imager tool for your operating system. This will automatically download the image file for the latest version of Raspbian and flash it to your microSD card directly.Once the Raspberry Pi Imager tool is installed, remove your Raspberry Pi’s microSD card and connect it to your PC, then launch the Raspberry Pi Imager. In the Imager window, click the Choose OS button and select Raspbian from the option window.
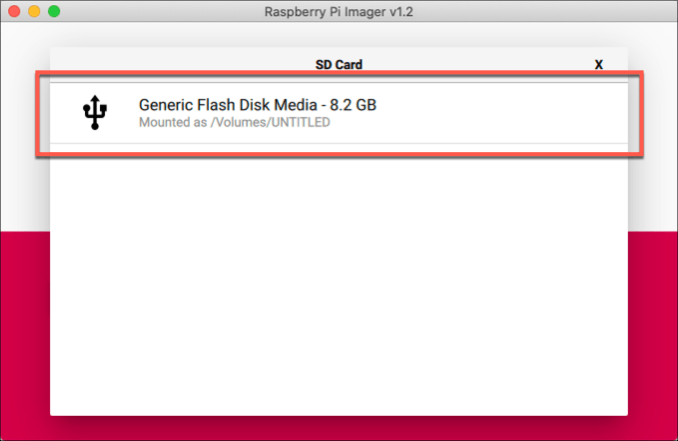
With Rasbian selected, click the Choose SD Card button, then select your microSD card from the SD card selection menu.
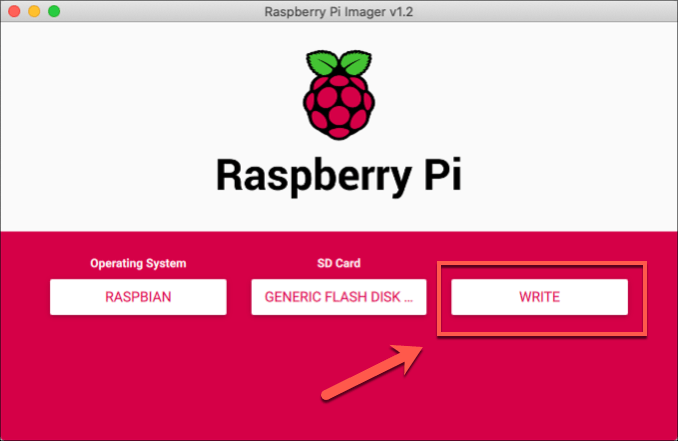
When you’re ready to begin flashing your microSD card with the latest version of Raspbian, press the Write button.
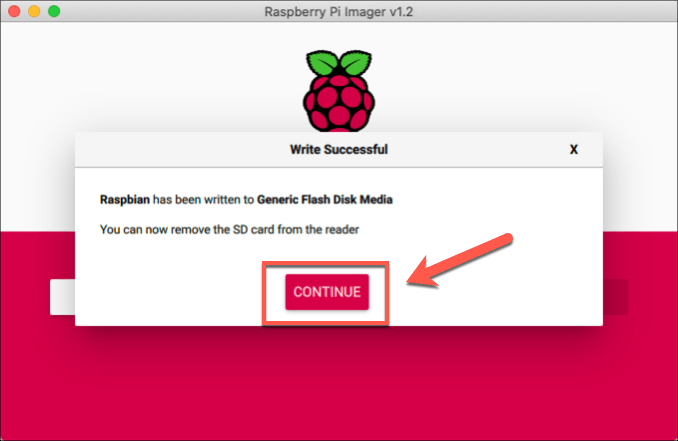
The Raspberry Pi Imager tool will take some time to download and write Raspbian to your microSD card. Once the process is complete, press Continue to end the tool.
You’ll be able to safely remove the microSD card, insert it back into your Raspberry Pi and power it up at this point. If the process was successful, you’ll be able to proceed with the initial setup process and restore any backed up files to your new Raspbian installation. You should also open a terminal window and run sudo apt update && sudo apt full-upgrade to ensure that the latest software packages are installed for your fresh Raspbian installation.
Keeping Your Raspberry Pi Updated
While Linux devices like the Raspberry Pi are generally considered to be more secure than their Windows counterparts, that doesn’t mean it isn’t essential to keep your Raspberry Pi updated. Regular updates bring new software, bug fixes, advancements, and more. Now you know how to update a Raspberry Pi, it’s probably a good idea to get comfortable using the Linux terminal, especially with some cool Linux terminal commands you can try on your Pi. Let us know your own Raspberry Pi tips and project ideas in the comments section below.
