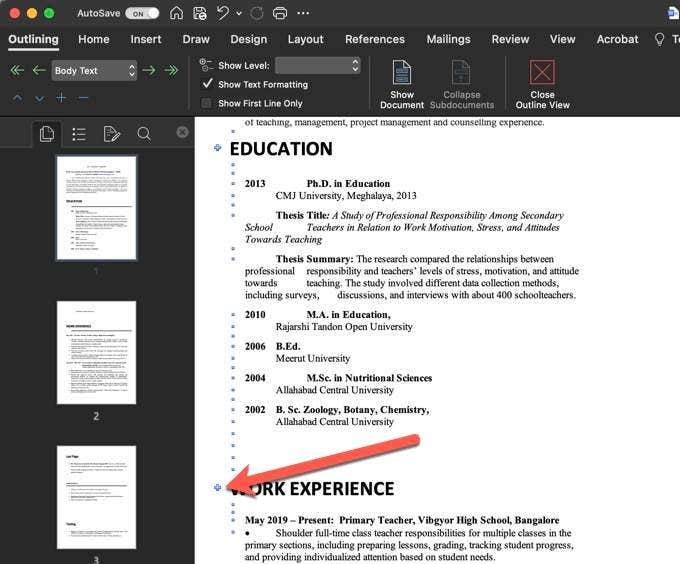
It’s worth noting that to rearrange pages in Word on a Mac, you should skip down to Method 3 (outline view) mentioned below.
Copy and Paste Is Annoying
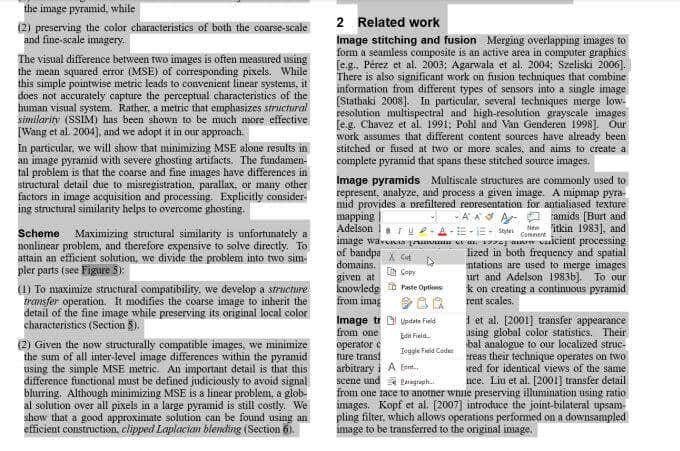
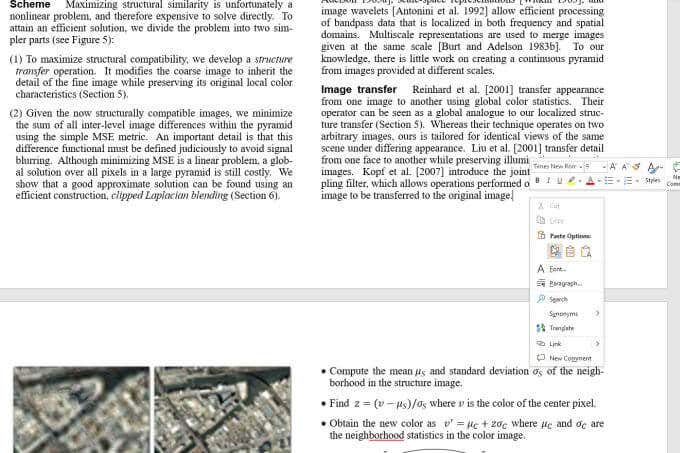
You probably already use the copy and paste approach to moving around pages in Word. This is essentially what most people do. It’s labor intensive and difficult to maintain consistent formatting and pages. This approach involves highlighting entire pages, then pressing Ctrl+X on your keyboard to Cut the highlighted text. Alternatively, you can right-click the highlighted text and select Cut. This removes all the highlighted text and moves all other pages in the document up. Move to the page where you want to paste what you’ve just removed. Put the cursor at the end of the last page and press Ctrl+V on your keyboard, or right-click and select Paste (or one of the Paste options). This will insert the highlighted text where your cursor is located and move all of the other pages in the document down. This sounds like the simplest approach to rearrange pages in Word, but it comes with a long list of problems.
Added spaces at the end of pages may change the formatting.The next page after where you pasted may not start where you wanted it to.Page numbering can get mixed up.
These aren’t always easy issues to fix. Thankfully there are better ways to rearrange pages in Word.
Method 1: Rearrange Pages in Word with the Navigation Pane
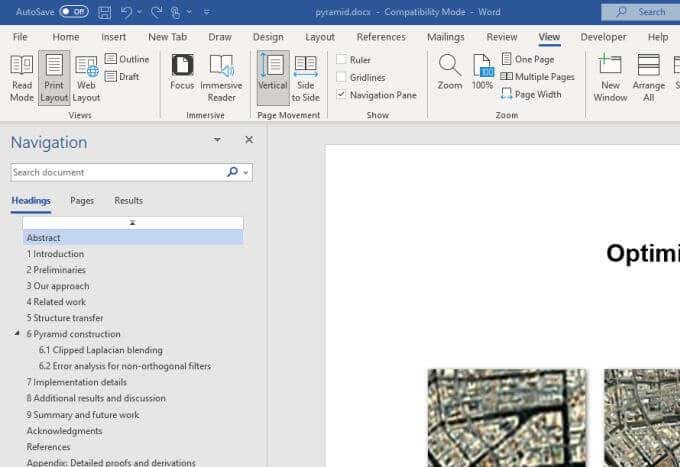
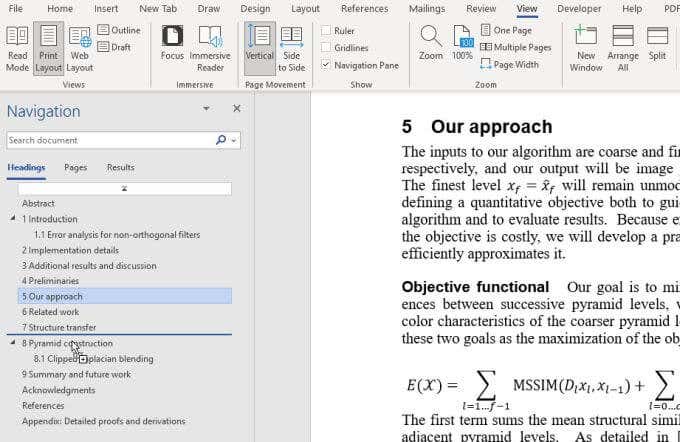
One of the quickest ways to see and rearrange all pages in Word is by using the built-in navigation pane. To enable this, select the View menu and enable the checkbox next to Navigation Pane. Now, at the left side of your document, you’ll see your document organized in order of Headers. If your document is well-formatted where each page or section you want to move around starts with a Header, then this is a great way to move sections around. Just click and hold on the header you want to move and drag it up or down in the navigation pane. Release the mouse wherever you’d like that section to go. Typically, if you make sure to choose to move the highest level headings, it’ll move everything (including its own subheadings). Note: This only works well if you have a document that’s formatted with one header per section. If you use a lot of sub-headers or headers are numbered, you may mix up a lot of the original organization in the document using this approach.
Method 2: Use Page Breaks to Easily Rearrange Pages in Word
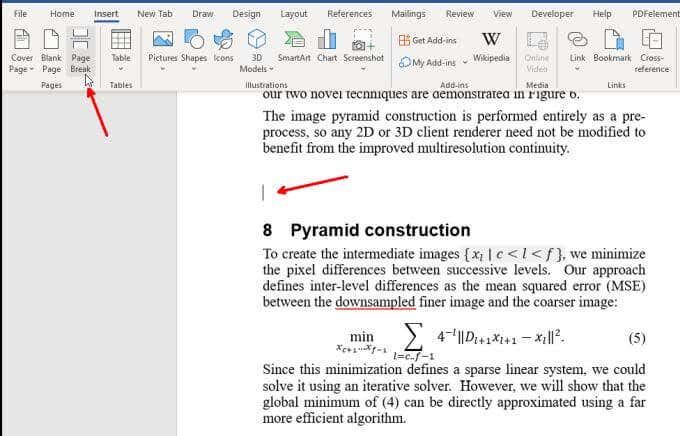
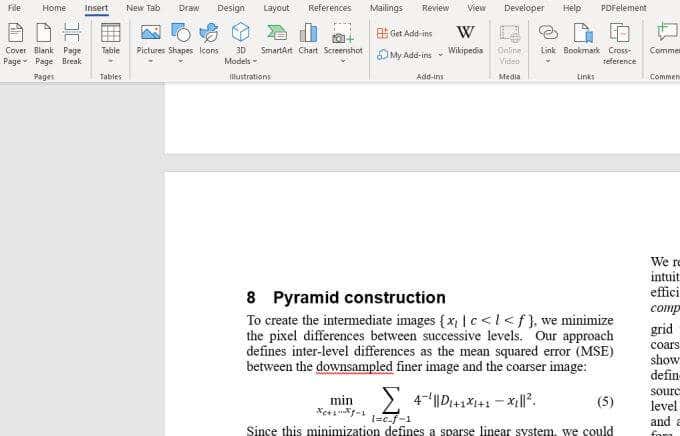
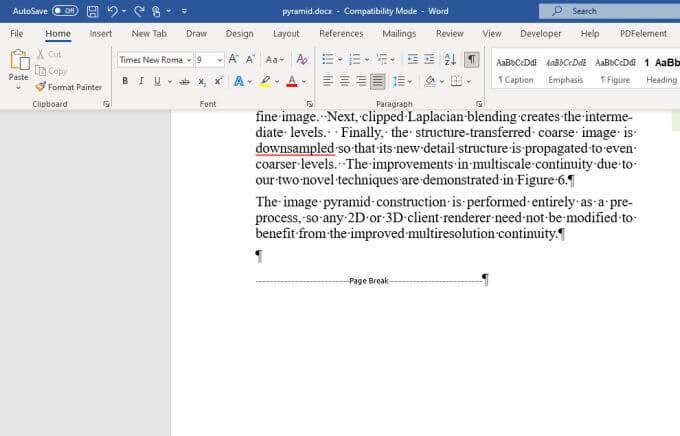
Now that we’ve covered the very basic methods almost everyone knows and uses, let’s take a look at some more advanced ways to rearrange pages in Word. One of the best ways to do this is using Page Breaks. Page Breaks force the end of a page to occur at a certain point in the document. The next page will always start on a new page, with appropriate spacing applied. To do this, place the cursor at the beginning of the section you want to start on a new page. Select the Insert menu, and select Page Break from the ribbon. You’ll see the next section get pushed all the way down to an entirely new page. If you ever want to see where you’ve placed page breaks inside a document, select the Home menu and select the Paragraph icon. This will show you all formatting codes, like Page Break or Section Break. Now you can use any of the rearranging methods in the previous two sections to copy and paste pages or headers, but now when you move things around you won’t lose any of your original formatting. Thanks to the Page Break, all originally formatting gets retained along with your copy and pasting.
Method 3: Rearrange Pages in Word Using Outline View
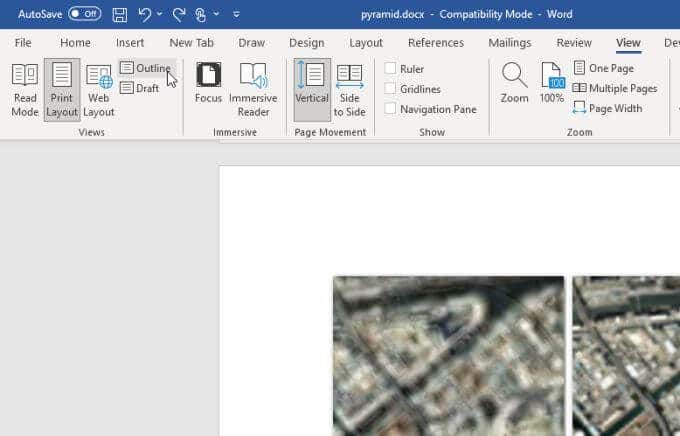
Here’s another neat trick to rearrange pages using headers a little more cleanly. As noted earlier, this method also works for Word on Mac. You’ll have to make sure that you have Headers (like H1, etc) in your document if you want to rearrange the pages. Select the View menu and change the view to Outline. This switches to outline view and moves you over to the Outlining menu. You’ll see an outline of your entire document by headers and subheaders. Place the mouse over the + icon to the left of the header. Your mouse icon will change to a Move pointer. Click and hold the mouse and slide it up or down the outline wherever you’d like that section to go. You’ll see a line appear where the section will go once you release the mouse. Release the mouse to drop that entire section in the new location. On a Mac, it looks a bit different, but it’s the same principle. This is a lot like using the Navigation pane, except the layout is cleaner and it’s much easier to move sections and subsections around however you’d like. Just select Close Outline View in the ribbon when you’re done reorganizing your document.
Keeping Pages Organized in Word
The techniques above can help you rearrange pages in word without making an entire mess of your document. Just make sure to use formatting features in Word like Page Breaks or Section Breaks to preserve page formatting and numbering. Once you have all of that in place, mostly any of the approaches described in this article will work. But don’t forget to double check every time you rearrange a page just so you know everything is still laid out the way you intended. Thankfully, any of the methods above will renumber your headers appropriately depending where you drop a page. So you don’t have to worry about fixing your headers when you move pages around. If you’re looking for other Microsoft Word pro-tips, make sure to check out 12 Useful Microsoft Word tips and Tricks.
