If you’re getting an error message that your “TPM Device Is Not Detected error,” either at bootup or within Windows, there could be a few reasons why this component of your system isn’t working correctly. This exact error is usually tied to Dell Laptops, but the issue of a missing or faulty TPM is something that can affect any brand of computer.
What Is a TPM?
A TPM or Trusted Platform Module is a security chip in your computer that provides secure cryptographic keys that let you secure data and prevent unauthorized access to your computer. Any data encrypted using the TPM can only be decrypted using that. A computer can have two types of TPM. The first is a module that lives on the motherboard. This can be a permanent part of the motherboard, or it can exist as a removable module. The second type of TPM exists within the computer’s CPU and is known as an fTPM or Firmware TPM. Windows 11’s system requirements stipulate a TPM 2.0 module, which is why many older CPUs and motherboards may not be supported, given that they use an older version TPM or don’t have one at all.
Do You Even Have a TPM Chip?
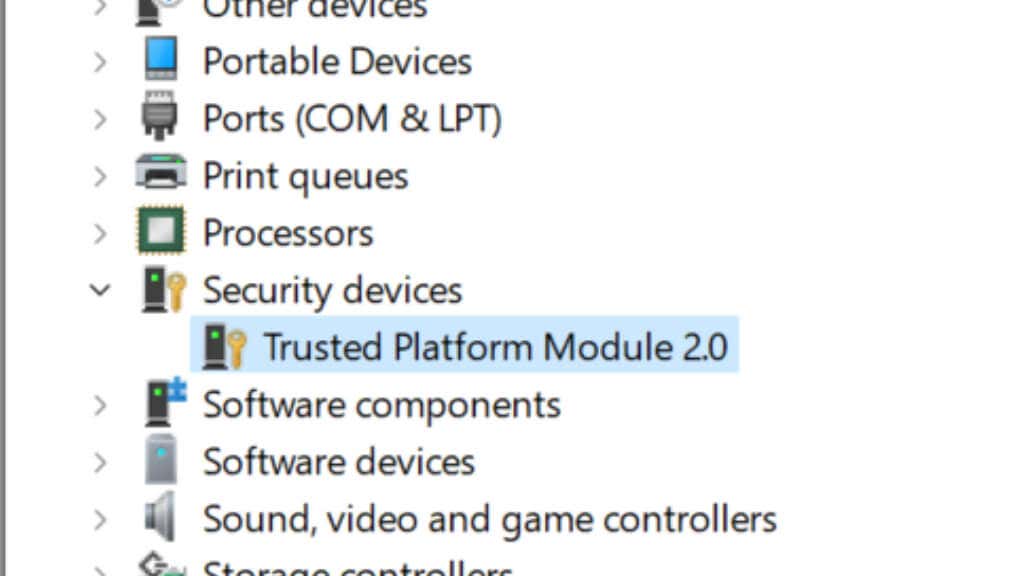
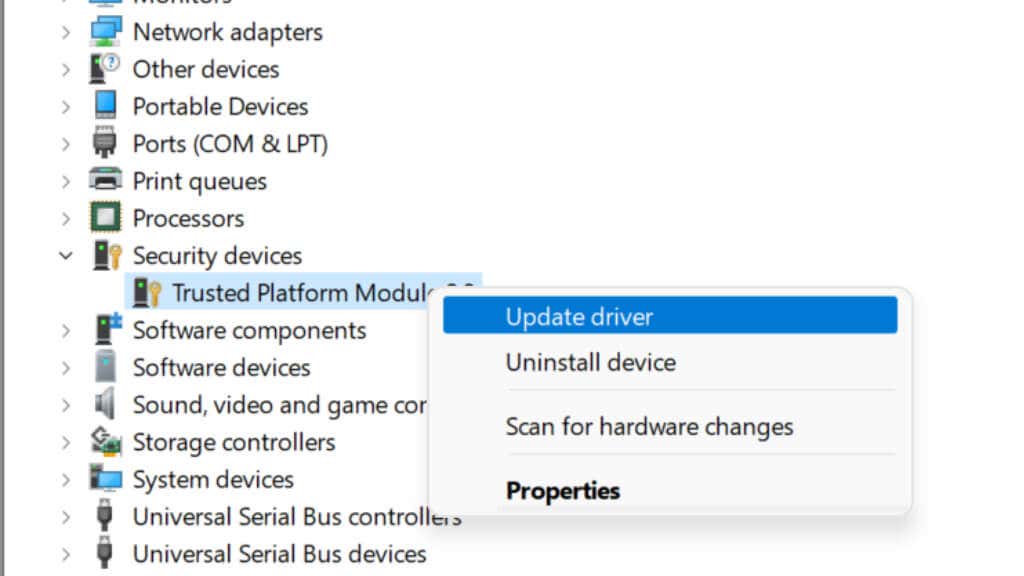
Before Windows 11, having a TPM was considered a business feature, and it’s not something you’d find in typical personal laptops or gaming PCs. It’s a good idea to look up your motherboard and CPU online to see if they have a TPM 2.0 listed as an official part of the device’s model specifications. Any “TPM device not detected” error on a computer that doesn’t have one at all makes perfect sense. Any software or features that require this technology will give you an error. You can also check for the presence of a TPM in the Windows Device Manager under Security Devices.
Check Your Network Connection (Or Contact the Admin)
In some cases, a TPM is configured to work in tandem with a network connection. For example, a system administrator may control the keys and validation process over your company’s wired network connection. This means that if there’s something wrong with the network connection, it may prevent your computer from starting up and result in an error. The first thing you should do is check that the physical connection is working. Your network adapter will usually have a “link” light that confirms the cable is connected and working. If everything seems physically okay with your connection, but the TPM still doesn’t work, you’ll need to get in touch with the system administrator to see if there’s an issue with the server that has to enter the TPM keys.
Ensure TPM Is Enabled
While your computer may be equipped with a TPM, that doesn’t mean it’s activated. Whether the TPM is enabled or not depends on a toggle setting in your BIOS. Since every BIOS differs depending on the brand and model of the motherboard, you’ll want to check the motherboard manual for exact instructions. Alternatively, you can look for an “enable TPM” setting under the security tab, which is the usual location. Accessing your BIOS (or UEFI) is usually done by pressing a specific key as the computer boots up. The key should be displayed on-screen at startup, or you can find it in the computer or motherboard’s manual. It’s usually the Del key or F12, but numerous variations exist such as Ctrl with a function key or simple Esc key.
Install the Latest Windows Drivers
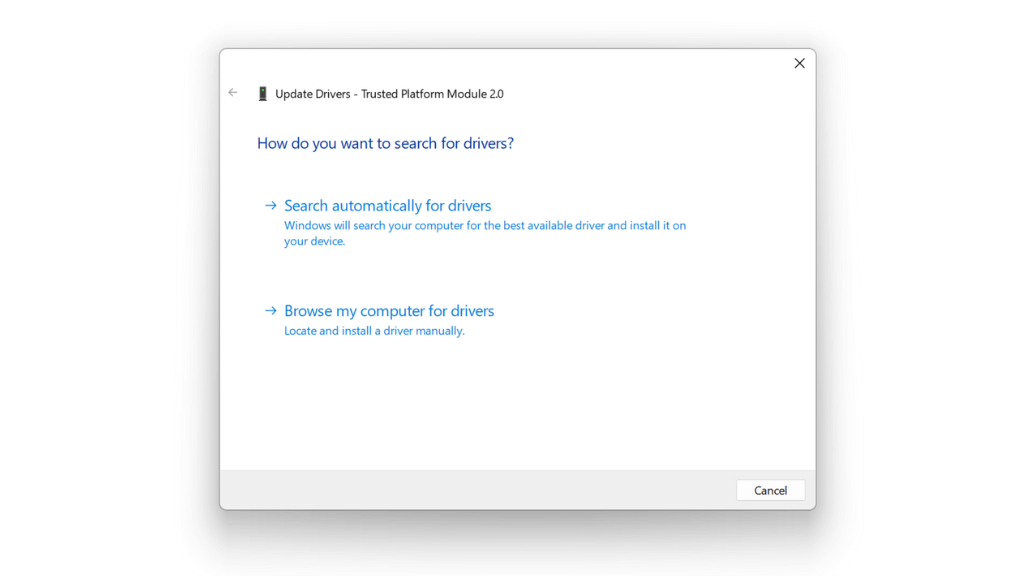
Enabling your TPM hardware in your computer’s BIOS is a good first step, but for the TPM to do its job in Windows itself, you still need a Trusted Platform Module driver. These drivers should be included as part of your motherboard’s driver set or automatically updated and maintained by Windows Update. If not, you can manually update it. To update your TPM: If this method doesn’t work, you should first visit your motherboard (or laptop) manufacturer’s official website and check if there are updated TPM drivers. Then download and install them manually. Generally, you don’t need to uninstall the old drivers first, the new drivers will replace them.
Update Your TPM Module Firmware
The latest version of the firmware for your TPM can resolve bugs, add TPM features, bring it up to date to work properly with later versions of your operating system or make it compatible with the latest Windows drives. To update your motherboard’s TPM module, you’ll need the specific update utility from the manufacturer. For example, Dell offers its customers a TPM firmware update tool. Check with your specific manufacturer if there’s a new firmware update for your TPM module.
Reset BIOS/UEFI to Factory Defaults
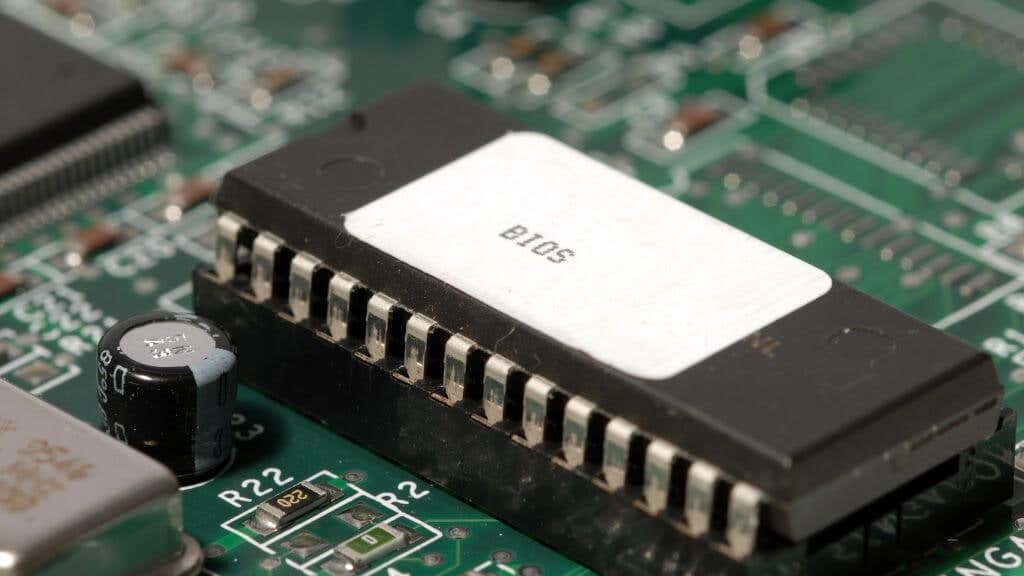
Your BIOS is the firmware that controls the motherboard directly and makes it possible to boot the computer up in the first place. The TPM module depends on the BIOS (or UEFI in modern computers) being properly configured. To rule out that a misconfiguration problem is behind your TPM issues, reset the BIOS or UEFI settings to default and see if that resolves the problem. Accessing your BIOS or UEFI differs from one computer to another. Usually, it requires you to press a specific key or key combination, which is displayed on-screen at startup. If not, refer to your computer or motherboard’s manual. Once in your BIOS, there should be a “reset to default” option, usually on the same page as “save and exit” and “exit without saving.” You don’t have to worry about losing any data in Windows; this only affects the settings in your BIOS.
Drain All System Power
If resetting your BIOS settings doesn’t help with your TPM error, another trick that seems to work in some cases is to completely drain the computer of power and then boot it up again. On a desktop computer, shut down the computer, then remove the power cord from the rear of the power supply. Following this, hold the power button for about 30 seconds to ensure that any capacitors holding a charge, discharge it. Then reconnect the power and turn the computer on again. On a laptop, this is only possible if you have a removable battery, preferably one that can be removed without opening the laptop itself. The process is the same as for desktop computers, but you must also remove the battery. If you don’t have an easily removable battery, it’s not worth the potential risk of damage to your computer to remove it to attempt this fix.
Update or Roll Back Your BIOS
If there’s a new firmware update for your BIOS or UEFI that specifically mentions improvements or fixes to TPM, it’s worth considering if your TPM is acting up. Alternatively, if your TPM problems began with a firmware update for your motherboard, flashing back to the previous version is also an option. Either way, carefully consider the risks of a firmware update for the BIOS or UEFI, if anything happens to interrupt it, you could be stuck with a dead motherboard, so this should be a last resort.
Manually Clear the TPM
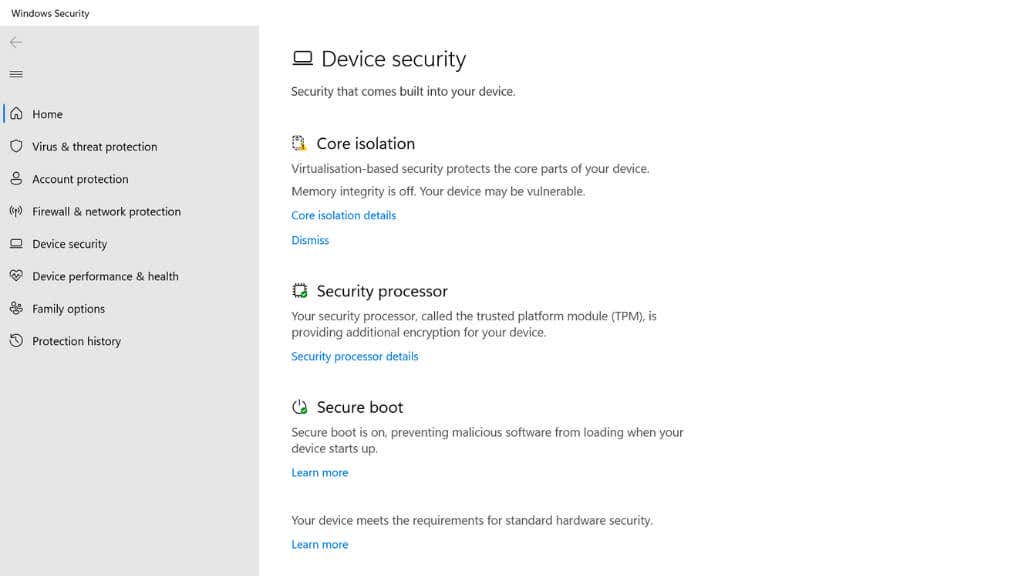
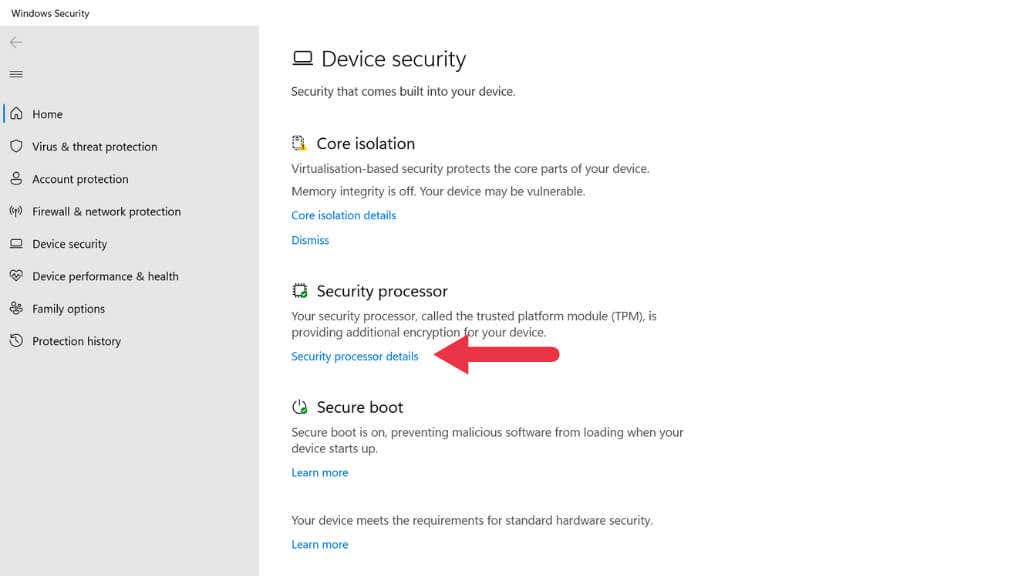
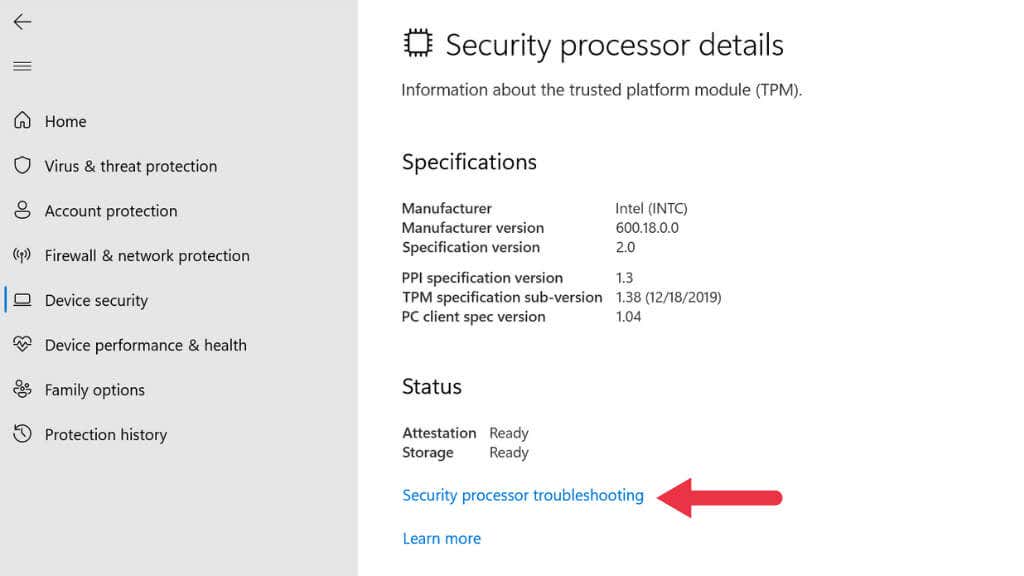
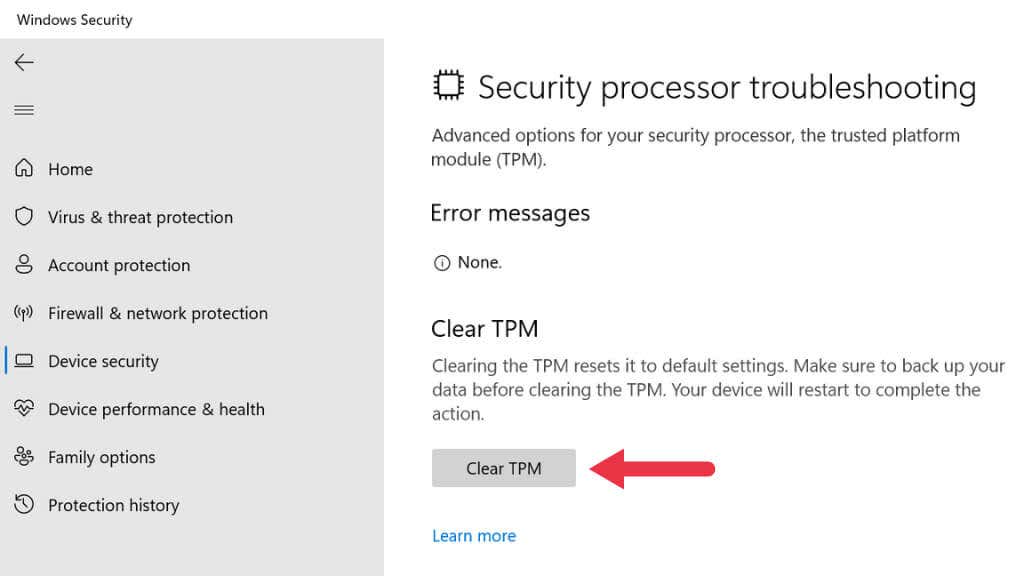
You can manually clear your TPM as another way of resetting it. Before you do this, you need to decrypt and back up any data that has been encrypted using the TPM. On Windows, this mainly includes anything encrypted by BitLocker. Be sure to turn off BitLocker before clearing your TPM or you may lose data! Even if you do this, back up your irreplaceable data to the cloud or to an external drive. You can also search for Security processor troubleshooting directly from the Start Menu.
Replace the TPM Module
If your computer has a removable TPM module and nothing else you’ve tried works, you can replace it with a new module compatible with your motherboard. Just as with clearing your TPM, if you have the opportunity, you should decrypt and back up your data before doing this. Any data encrypted using the old TPM will be unreadable without it.
Contact Your OEM (Original Equipment Manufacturer)
If you don’t have a removable TPM and nothing you try works, it’s worth getting in touch with your motherboard vendor or OEM system builder for help. Your system may still be under warranty, and you could be eligible for a repair or replacement.
