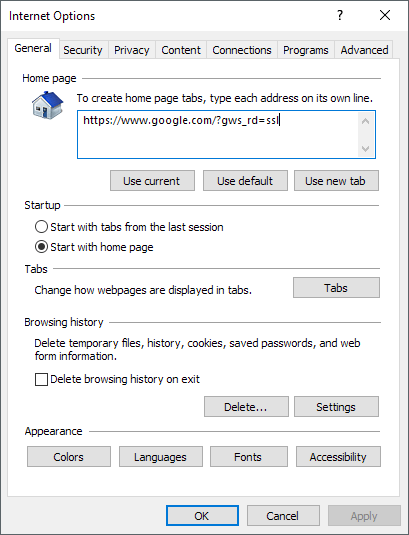
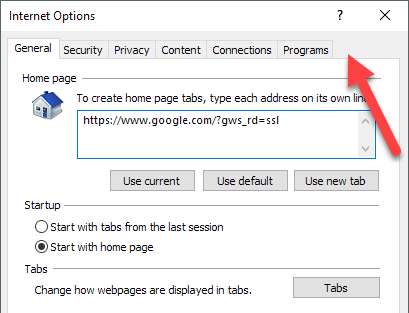
I have worked at many companies that hide the Internet Options tab in Internet Explorer to discourage users from changing the options, which makes sense since network admins are the only ones who are supposed to access these options. In a controlled environment, companies usually allow only one type of browser like Internet Explorer and those companies usually don’t allow their employees to change the Internet Options like default the homepage and proxy server. Below is a typical Internet Options window:
There are several ways to disable the Internet Options tabs in IE and I’ll explain the different methods in this post. The first method uses Group Policy, but will only work if you have the Pro or Ultimate versions of Windows. If you are running Home or Home Premium, then skip down to the registry section.
Disable Internet Options in IE via Group Policy
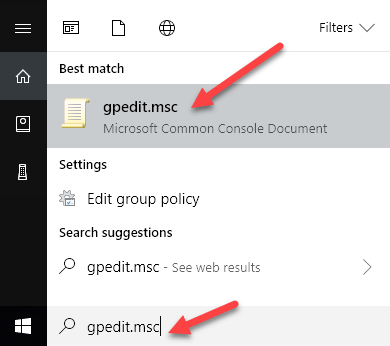
To disable any tab in the Internet Options window, follow these steps below: Step 1: Click Start and type GPEDIT.MSC in the search bar and hit enter to launch the Group Policy editor window.
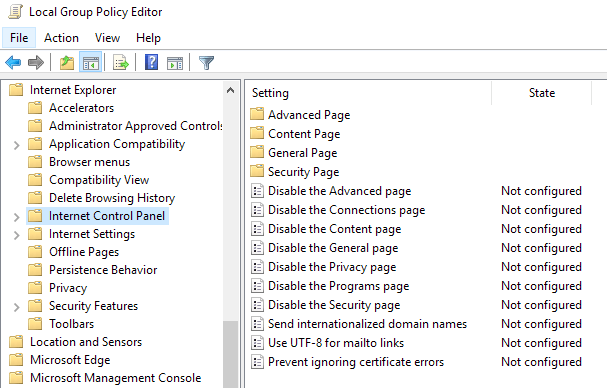
Step 2: In the Local Group Policy editor window expand User Configuration > Administrative Templates > Windows Components > Internet Explorer then click on Internet Control Panel.
Step 3: On the right pane of the window, double click on the item you want to disable. For example, to disable the Advanced tab, double click on Disable the Advanced page option.
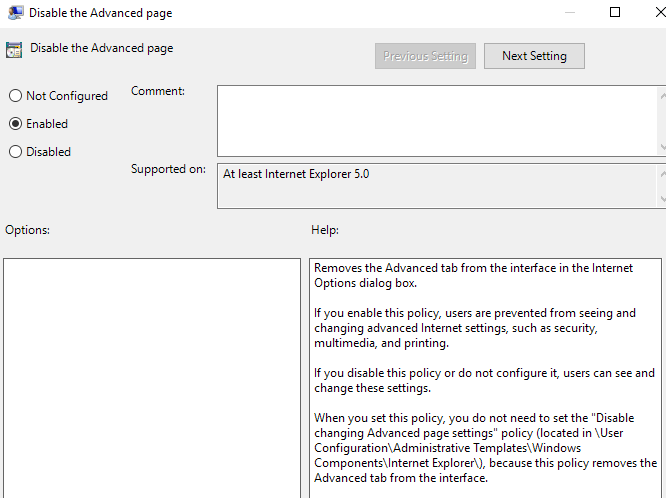
Step 4: In the properties window, click on the Enabled option and click OK. The Advanced tab in the Internet Options window will now be disabled and removed.
Step 5: Follow the previous steps to disable other items in the Internet Options window. To enable items, just select the Not Configured option in the properties window and click OK. There you have it! For less savvy computer users who don’t know about GPEDIT, it should discourage them from changing the advanced settings in IE.
Disable IE Options via Registry Editor
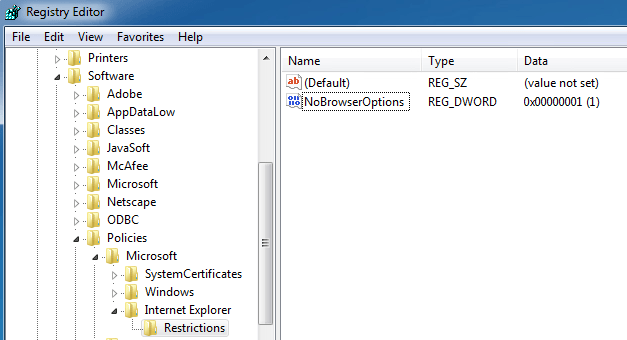
The second way to disable tabs in IE options is to use the registry editor. This is a bit more complicated, but is the only option if you can’t access group policy editor. You can open the registry editor by clicking on Start and typing in regedit. Once there, navigate to the following key: Note that if you want to disable this option for all users on the PC, navigate to the same key, but under HKEY_LOCAL_MACHINE. If there isn’t already a key called Internet Explorer under Microsoft, you’ll have to create it manually. Just right-click on Microsoft and choose New – Key. At this point, there are two options. If you want to disable the entire Internet Options dialog, you can create another key under Internet Explorer called Restrictions.
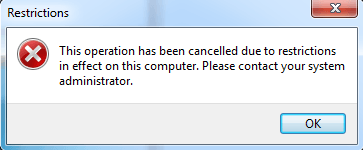
Lastly, you’ll create a new DWORD value in the right-pane inside Restrictions called NoBrowserOptions. Give that a value of 1 and restart Internet Explorer. If you try to go to Internet Options, it will give you an error message.
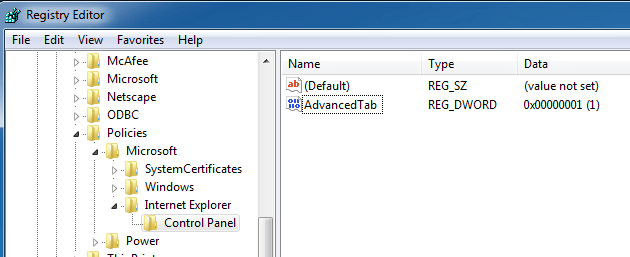
If you don’t want to disable the whole dialog, but instead just a few of the tabs, then you should create a new key called Control Panel under Microsoft instead of Restrictions. Inside of that, you’ll create DWORD entries that correspond to the tabs:
As you can see above, I created the Control Panel key under Internet Explorer and then created a DWORD entry in the right-pane called AdvancedTab with a decimal value of 1. This removed just the advanced tab from the IE options window. Hopefully, these methods will allow you to gain more control over Internet Explorer advanced settings in your environment. If you’re having issues, feel free to comment and I’ll try to help. Enjoy!
