For example, you may see simple names like Airport WiFi or funny ones like FBI Surveillance Van 4, which are SSIDs for those specific networks. From the list, you can identify your network’s name and join to connect to the internet. Most router manufacturers set default router SSIDs like NETGEAR_XXXX or Linksys_XXXX. If you’re on a home WiFi network, you can opt to leave it as it is, or personalize it with a name of your choice. We’re going to show you how to do it.
Change Your Router SSID
Find your router’s IP address.Log in to your router’s administrative console.Change the SSID and password.Update the connection for all devices.
Note: The process of changing your SSID is generally the same across major routers, though the exact names of settings and menus may vary depending on the model you’re using. When in doubt, check the router’s instruction manual for specific instructions.
Find Your Router’s IP Address
The first step is to find the router’s SSID. You can do this by checking the case of the router where both the default network name and password are printed. Next, find your router’s local IP address and log in from a web browser to access the administrative console. When prompted, enter the current username and password details to access the control panel. The IP addresses vary from one router to another, for example, NETGEAR routers use http://www.routerlogin.com while Linksys routers use 192.168.1.1. Some routers also use the 192.168.0.1 IP address, but if you’re unsure, you can check your router manufacturer’s website or documentation for the local address and logins.
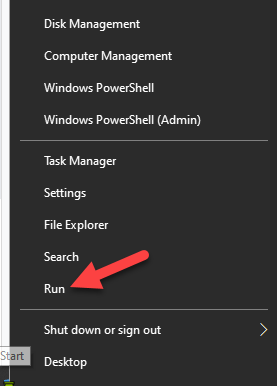
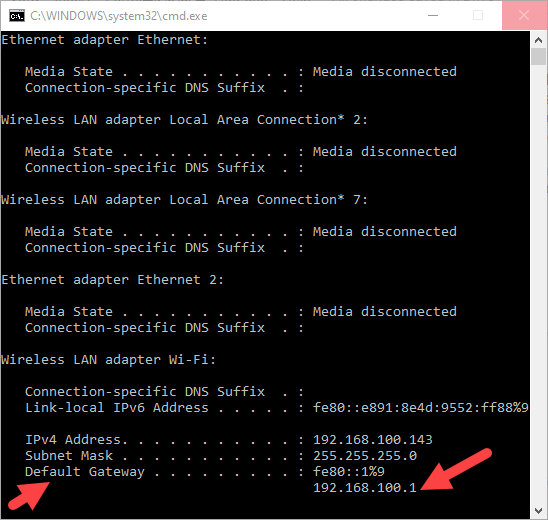
A quick way to do this is by checking the default gateway on your computer. Right-click Start>Run and type CMD to open a Command Prompt window.
Type ipconfig, press enter, and look for Default Gateway to view the associated IP address.
For macOS, click Apple menu>System Preferences, click the Network icon in the new window.Select your internet connection and click Advanced and change to TCP/IP tab to find your router’s IP address.
Log Into Your Router’s Administrative Console
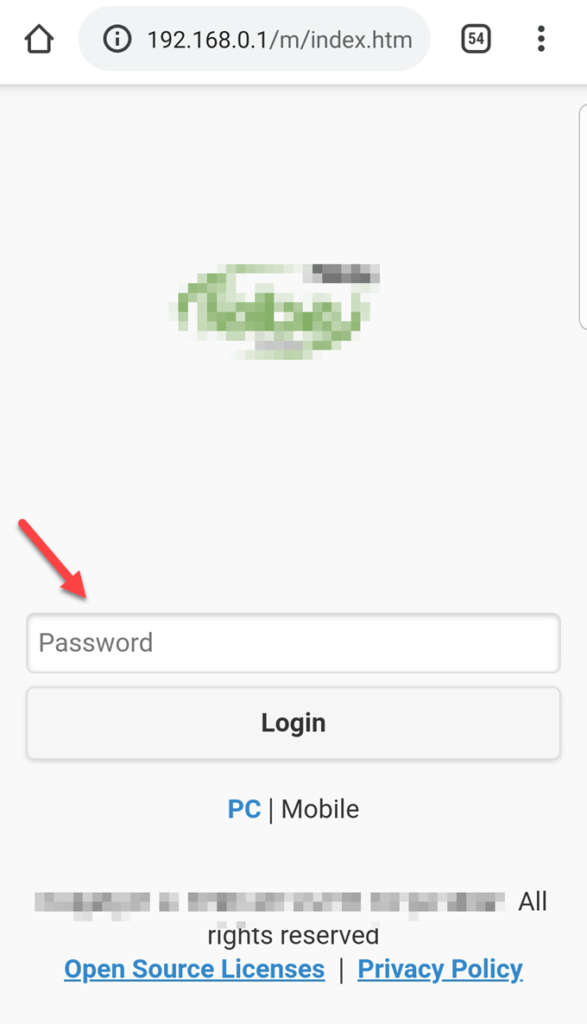
Go to your web browser, preferably on your computer, and type in the IP address to access the admin console. Some router manufacturers provide smartphone apps from where you can change the settings, while more expensive options come with built-in touchscreens. To do this, type the IP address on the browser, and press Enter. Here, you’ll enter the router’s username and password. If you’ve never changed these details, use the default logins that came with your router which can be found on its case or in the user manual. If you had set a custom password and can’t remember it, the only way out of it is to reset the router’s default settings.
Change The SSID & Password
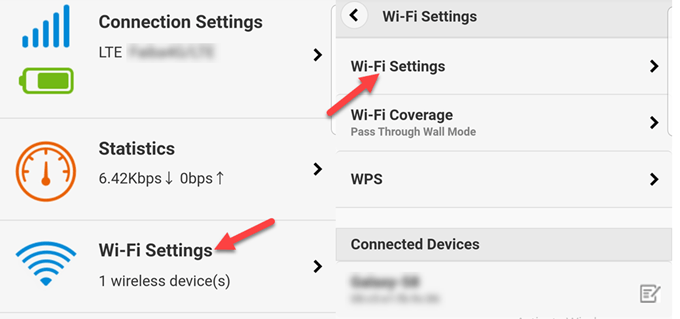
From the admin console, go to the WiFi settings section and tap Wifi settings.
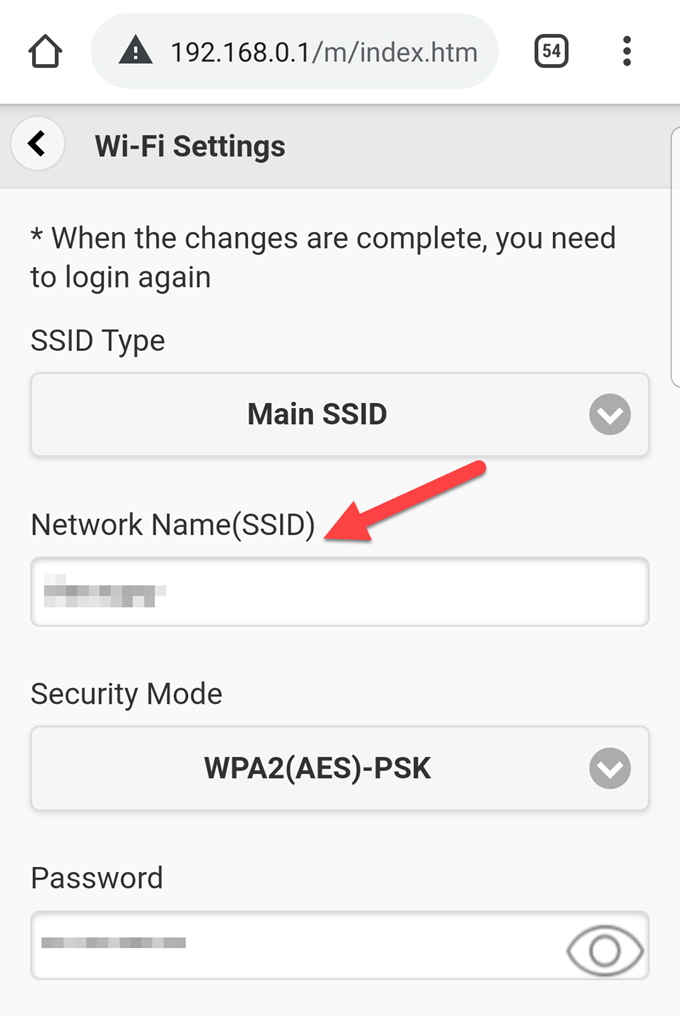
Find a section for SSID or Network name. Type your name of choice (maximum 32 alphanumeric characters). Just make sure it isn’t offensive to other users in your community who may find it from the list of available networks.
Type in your WiFi password in the respective field, and click Apply or Save to apply the changes.
The changes will take effect immediately so you’ll probably discover that you’re no longer connected to your network. This is because your router is shutting down the old WiFi network with the previous SSID, and bringing up the new one with your personalized SSID, so it disconnects all devices. Some routers restart altogether for the changes to take effect, which means you may be disconnected even on a wired connection.
Update The Connection For All Devices
The final step is to update the network connection on all the devices that used the previous network name and password, to the newly named SSID and password. Once you do this, you’ll be able to connect to the internet. If there are multiple WiFi networks with the same SSID, your devices will try to connect to the network having the strongest signal or the first network available. However, if the networks have different passwords, your devices will only connect to one of them successfully.
Why You Should Change Your Router’s SSID
There are several reasons for changing your router’s SSID such as:
Having a personalized home network. The name is unique to you, and can be seen by anyone in the area who may be scanning for WiFi signals from their mobile device or computer.Avoiding confusion with other routers bearing similar names in your local area. For example, if there are two or three others using “Home” as their network name, you can change yours to a different one.Improve your home network’s security. While this doesn’t increase the network’s protection, changing the SSID name may keep network attackers or hackers away as it indicates the particular router is more carefully managed compared to routers using generic default SSIDs.
To secure your WiFi network, change the default admin credentials, and encrypt broadcasting signals using AES and WPA2. Finally, turn off the WPS and UPnP features, which usually have security vulnerabilities like bypassing security software. If you’d like to hide your router SSID and prevent others from seeing and/or connecting to it, you can do so if your router offers the option to disable SSID broadcasting. This ostensibly improves your network security as one would have to know the SSID and network password to gain access. However, you’d have to manually create a profile with the SSID and other connection parameters, plus your router SSID can still be intercepted from the device’s transmissions to your router and back while using the internet.
