Some screen sharing apps are simple cloud-based apps that let you launch a video conference where either you or the other person can share their screen and then offer control to the other person in the conference. Other screen sharing apps are fully functional remote-support applications that let you also access the file system of the other computer you’re connected to. The screen share app that you choose depends on what you need to do and what you need to access on the remote system.
1. TeamViewer
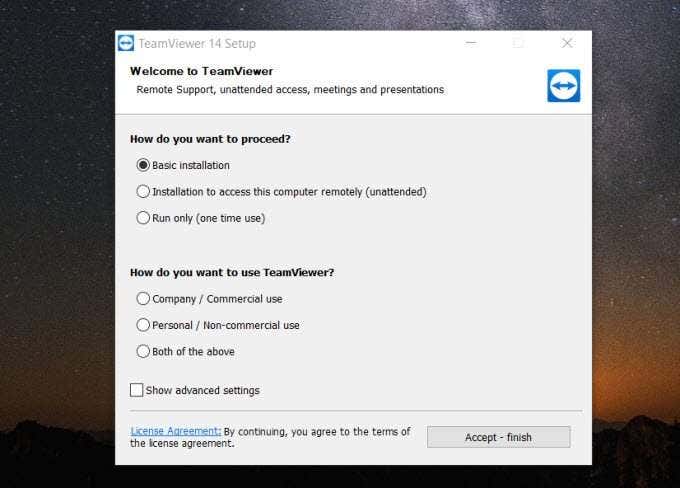
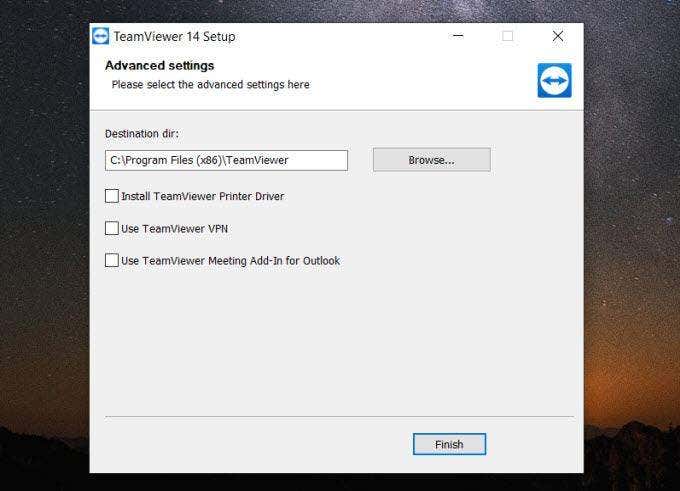
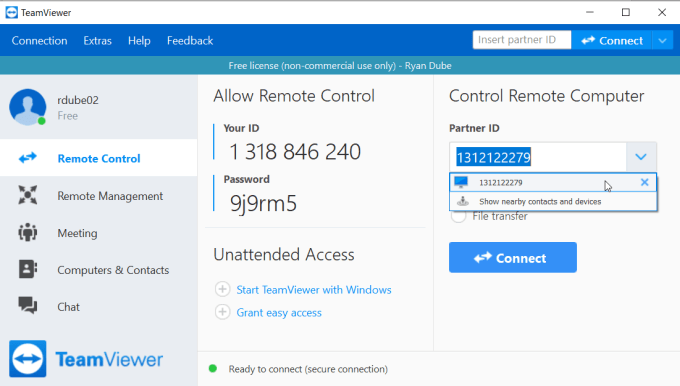
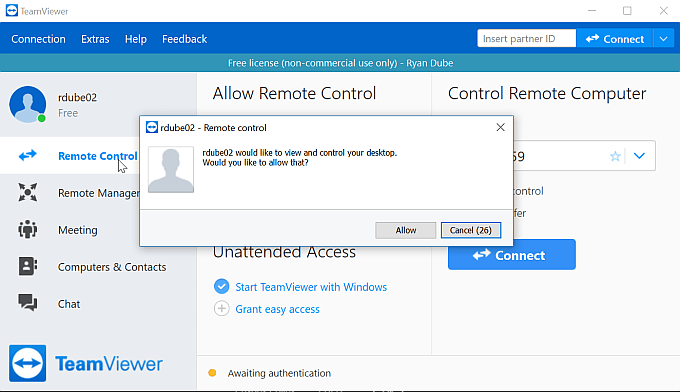
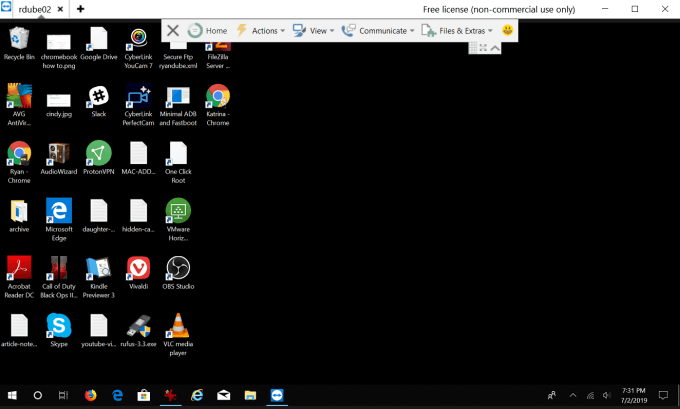
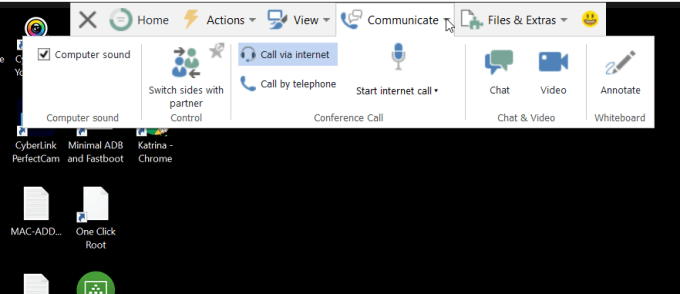
There is no list of screen sharing apps that wouldn’t have TeamViewer at the very top of the list. It’s a very popular, commonly used app for remote support. The reason it’s so popular is because there’s a free version anyone can use for non-commercial uses. It’s also extremely easy to use. When you first download and run the TeamViewer installer, you’ll have the option to set up a full version (Basic installation), or just set it up as a service (unattended) for remote access from another computer. Ideally, you’ll install the basic installation on the computer where you’re attempting to access the remote computer. Then, on the remote computer, have the remote user download and install TeamViewer using the “unattended” option. If you’ve selected Advanced Settings in the previous setup screen, you’ll have the option of enabling some of the advanced features that come with TeamViewer. These include including a printer driver to remotely print, a VPN feature, or an add-in to enable TeamViewer sessions from inside of Outlook. The easiest way to connect to another computer using TeamViewer is if you’re on the same network. If this is the case, just select the dropdown under Partner ID. In the list, you’ll see remote computers that are also logged in under your TeamViewer account. You can select this computer to instantly connect and view the remote screen. On the remote computer, the user will need to confirm that you have permission to remotely connect. Once they click Allow, you can see and control their remote screen. If you log into the remote TeamViewer installation with your TeamViewer account, all you’ll need to do to remote into that remote computer is type the password as part of the connection process. You’ll notice a control panel at the top of the window that you can use for various functions that’ll help you use the remote computer as well as communicate with the remote user. Some of those features include:
Leave a note on the screen for the remote user to find laterLock, sign out of, or reboot the computerSend Cntrl-Alt-Delete or other key combinationsChange the scaling of the view or screen resolutionAdjust view quality settingsAdd a side panel to communicate with the userInitiate a call via phone or internetLaunch a video callAnnotate over the screen so the remote user can see itTransfer filesRecord the sessionPrint from the remote computer
As you can see, TeamViewer is full featured and a very powerful tool for remotely connecting to and controlling a remote computer. Install TeamViewer
2. Windows Quick Assist
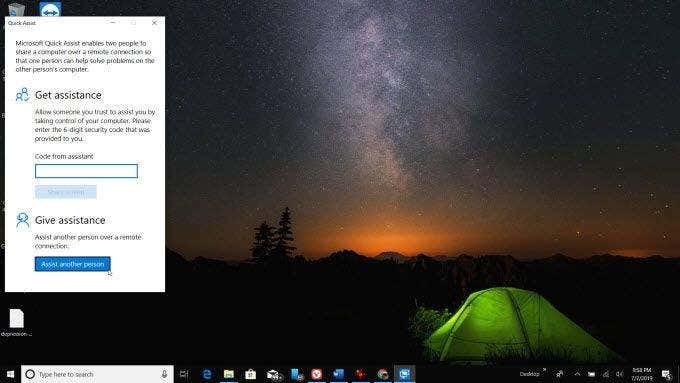
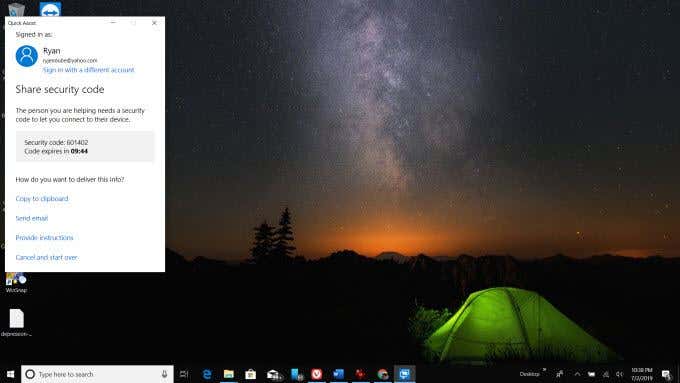
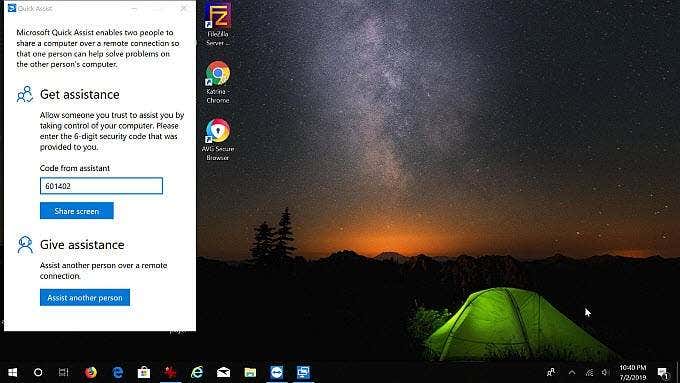
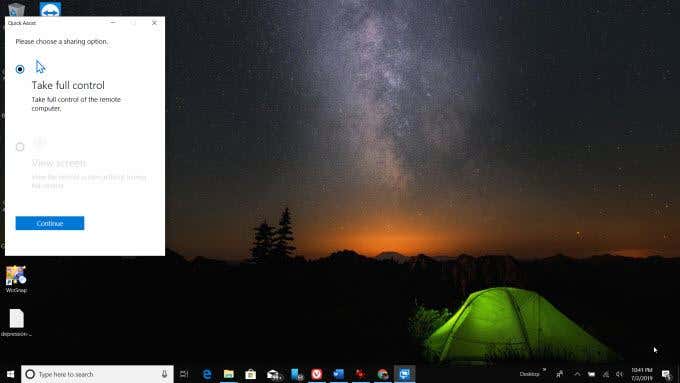
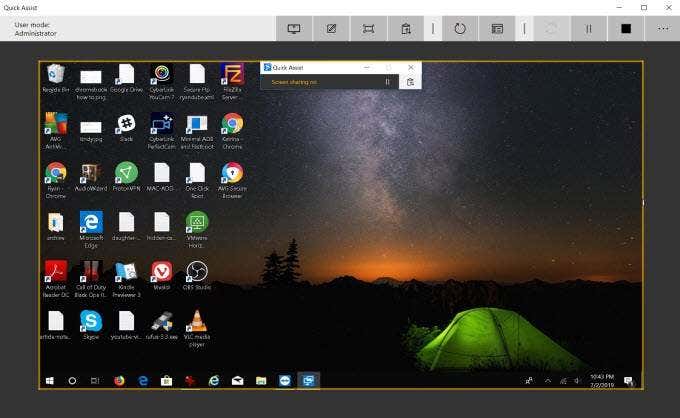
Another useful tool for remote screen sharing that’s not only free, but also comes pre-installed with Windows, is the Windows Quick Assist tool. If you’re helping another person who uses the latest version of Windows, you just need to make sure that you’re both running the Quick Assist tool. To open the tool, select the Start menu, type Quick Assist, and select the Quick Assist tool to open it. Once it’s open, select Assist another person to get started. You’ll need to sign into your Microsoft account to continue. When you first set up your computer, you likely had to create a Microsoft account. That’s the one you’ll need to use here. Once you’re done, you’ll see a security code that you can provide to the remote user. The remote user just needs to type the code and select Share screen. Then, they need to select Allow to provide you permission to connect. On your computer, select Continue to finish the connection. Finally, the two computers will link, and you’ll see a full screen view of what the user is seeing. Now you can take control, move the mouse around, and help the remote user with any issues they’re having. The top menu of the shared screen includes a panel of controls for you to use on the remote computer.
Select any monitorAdd annotations to the screenUse an “instruction channel” to pass messages to the remote userRestart the computerLaunch task manager
Windows Quick Assist is one of the easiest (and free!) screen sharing methods available. It’s fast, easy, and nearly everyone owns a Windows computer.
3. Skype
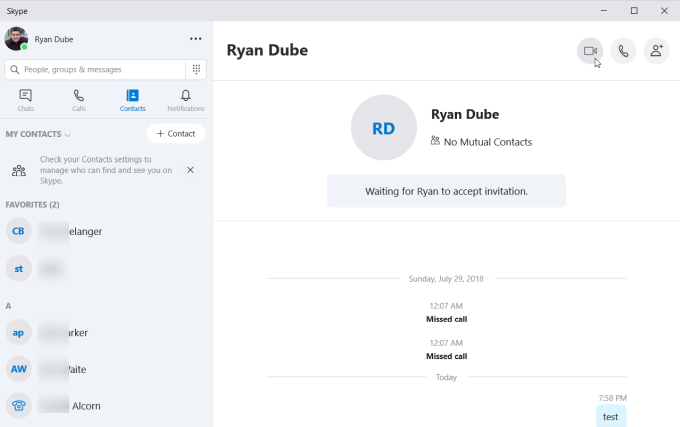
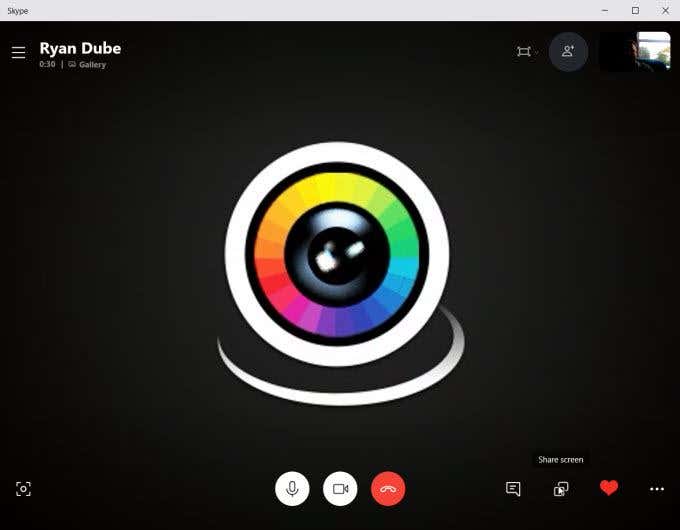
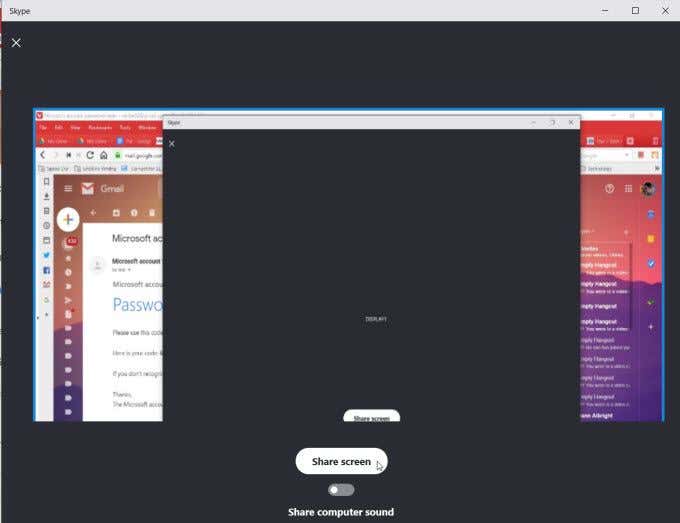
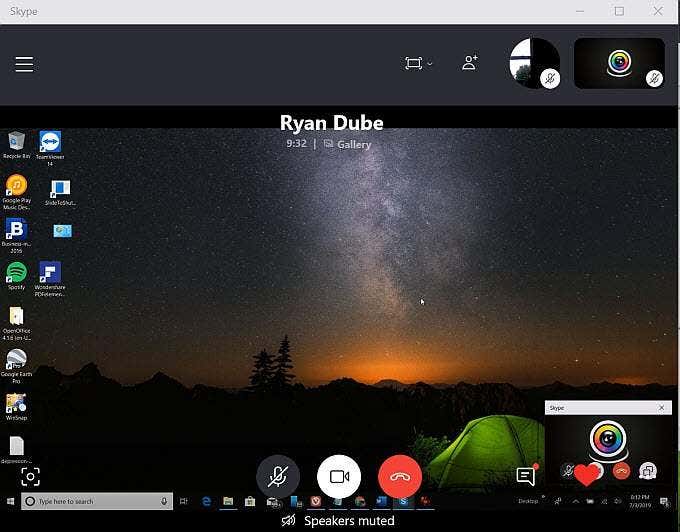
Skype has always been king when it comes to videoconferencing. And of course, any videoconferencing software that you can use to view someone’s desktop makes for an ideal remote support tool. The free version of Skype is good for connecting to the remote desktop by calling the user and having them share their screen with you. You can initiate a videoconference by selecting the video camera icon above their profile. Once you’re in the videoconference, either attendee (more than two are possible), can select the Share Screen icon at the bottom of the screen to immediately share their desktop with everyone else in the meeting. Once the remote screen displays, you may need to select the Share Screen button at the bottom of the screen to finish sharing it with all other people in the conference. Once the screen is shared, other people in the conference can walk the person sharing the screen through troubleshooting tips to fix their computer problem. Skype screen-sharing quality is excellent, and the screen updates are quick. With the free version of Skype, offering remote support needs to involve voice chatting combined with the person sharing their screen controlling the mouse. However, with the premium or business version of Skype, you’ll see an option while you’re sharing your screen to provide control to other people on the conference call. Install Skype
4. Join.Me
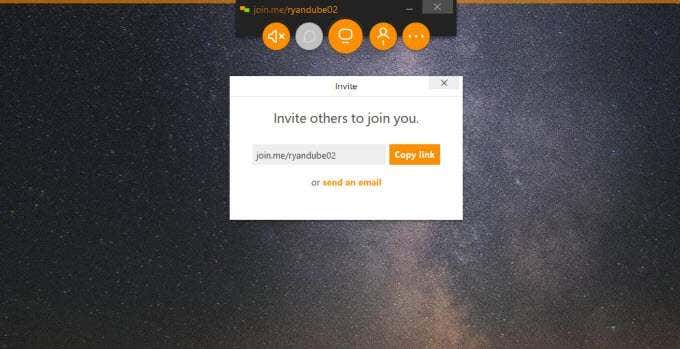
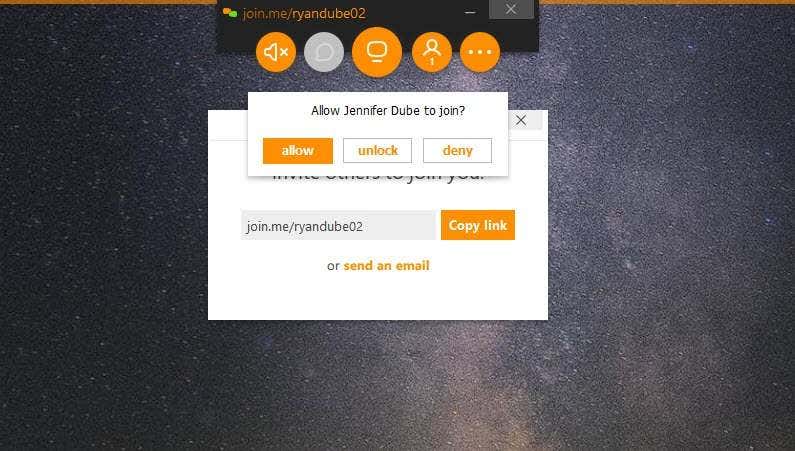
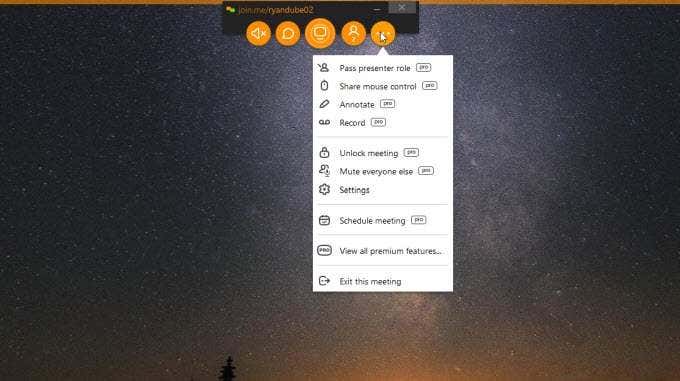
If you’d like to have a screen-sharing session using an easy to use app, you can’t go wrong with Join.Me. When you sign up with Join.Me, you can create a web link to use for your screen sharing sessions. You can click Start under Start a Meeting to launch your session. You can send any number of users your custom join.me link so they can join the session with you. You can send them the link in an IM yourself, or select the send an email link to send the user an email with the connection code. When they join your session, you’ll need to select allow to let them join the video conference. Just like Skype, the free version of Join.Me lets you share you screen and chat with other users in the session. This means the person who needs computer troubleshooting help needs to set up the session and invite users. However, the premium version of Join.Me allows for passing mouse control to anyone in the session, making it an idea screen sharing and remote troubleshooting tool. Other Pro features include annotating on the screen and recording the troubleshooting session. Use Join.Me
5. Screenleap
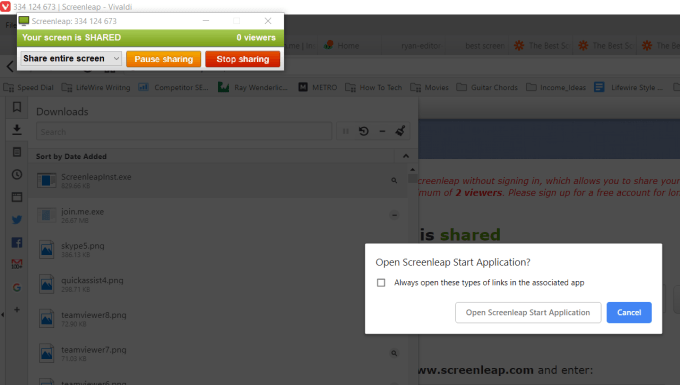
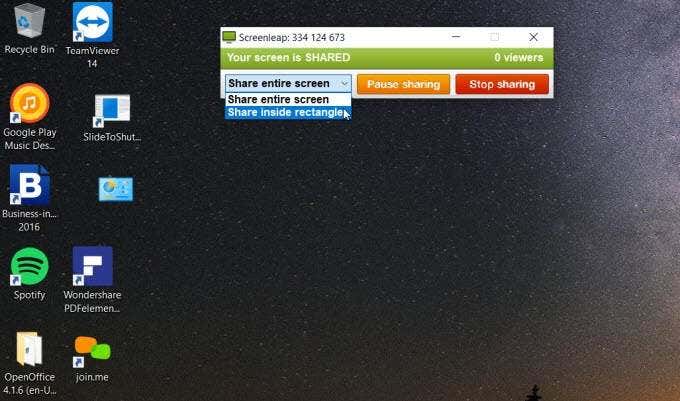
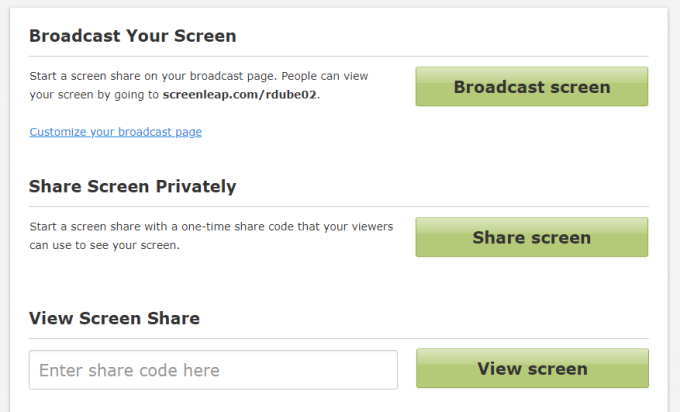
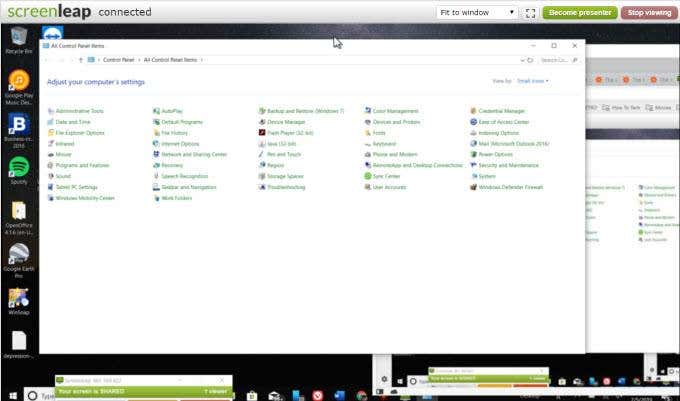
If you really don’t want to install a full-fledged application on your computer just for the purpose of screen sharing, Screenleap is a good solution. It installs as a Google extension and allows you to quickly share your screen with anyone over the internet in just seconds. The first time you run the application, you’ll need to select Open Screenleap Start Application and enable Always open these types of links in the associated app. Once you launch the app, you can change what you’re sharing using the dropdown list. Either share your entire desktop or share just a portion that you draw inside a rectangle. You’ll see your Screenleap session has a code listed at the top. You can tell anyone to visit screenleap.com, type the special code, and select View screen to see your shared screen session. To share you screen out using this app, you have two options from Screenleap.com. You can select Broadcast screen and share out your desktop to anyone who has your URL link (requires that you sign up for an account with your email). Or, you can select Share screen to immediately share out your screen and get the code to send to the person you want to share your screen with. The screen share works well, but there’s some lag since the transmission is sent and received form your browser to the remote user’s browser. Also, since it’s a bare-bones screen sharing add-on, you won’t be able to remotely control another PC using this app. You’ll need to talk over the phone while you’re remotely viewing the screen and talking the other user through troubleshooting steps. The free version of Screenleap allows for up to 40 minutes of screen sharing every day, which is quite a bit for free software. Use Screenleap
6.
CrankWheel
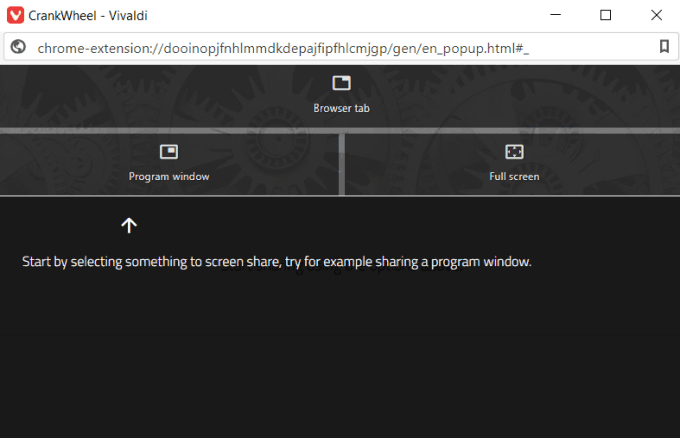
CrankWheel is another Chrome add-on that lets you remotely share your display. One thing that sets CrankWheel apart is that it’s extremely lightweight. Setup takes seconds. Also, it offers three main methods for sharing your screen.
Share just a single browser tabShare a single program windowShare your entire desktop screen
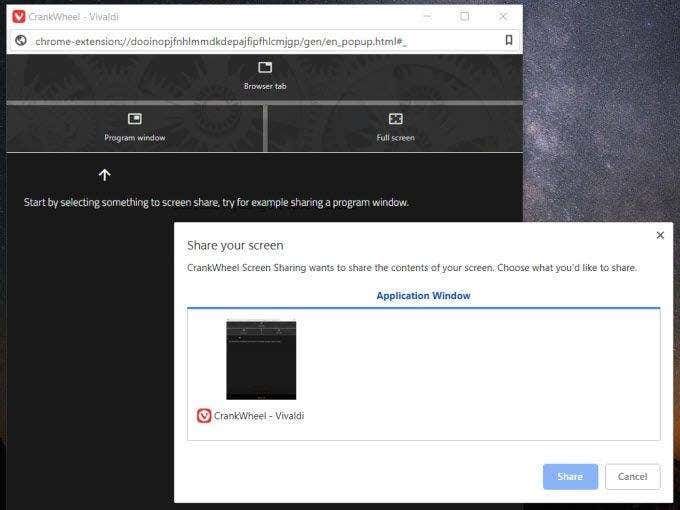
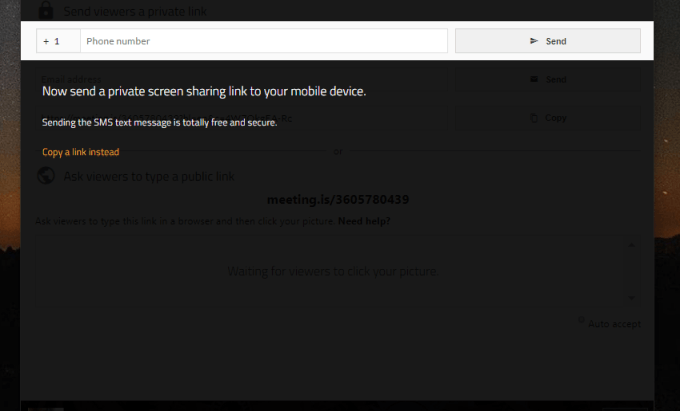
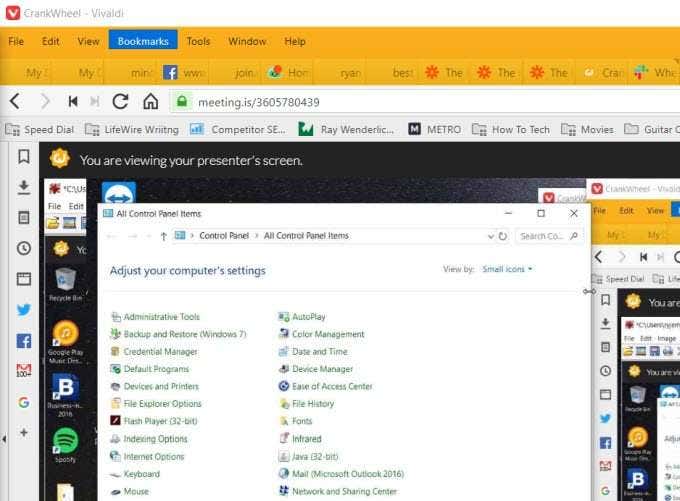
When you select any of these options, you’ll see a pop-up window that lets you select which tab or application you want to share to the remote user. There are two ways to share the screen. You can either type in the other user’s phone number and send an SMS with the share link, or you can copy the share link and email it or IM it to the remote user yourself. Once the other user enters the link into their browser, they’ll immediately see the screen that you’re sharing. This is probably one of the fastest and easiest ways to share your screen and have users remotely connect to your PC – or remotely connect to anyone else’s PC. The free version of CrankWheel allows 25 free remote screen sharing sessions per month, which should be more than enough for general troubleshooting help with family and friends. Install CrankWheel
